The Basics of Whole Home Generator Installation

Powering Through Outages: A Basic Guide to Whole Home Generator Installation
In an age where our lives are increasingly reliant on electricity – from keeping the lights on and food cold to powering essential medical equipment and staying connected – losing power during an outage can be more than just an inconvenience; it can be a significant disruption or even a safety hazard. This is where whole home generators come in, offering a reliable source of backup power that kicks in automatically when the grid goes down.
While the idea of uninterrupted power is appealing, the process of installing a whole home generator can seem daunting. It involves more than just plugging in a device. It’s a complex project requiring careful planning, electrical work, fuel connections, and adherence to local codes. However, understanding the basic steps and considerations involved can demystify the process and help you prepare for this valuable home upgrade.
This article will walk you through the fundamental aspects of whole home generator installation, from the initial planning stages to what happens on installation day and beyond.
Understanding the Core Components
Before diving into the installation process, it helps to know the main parts of a whole home generator system:
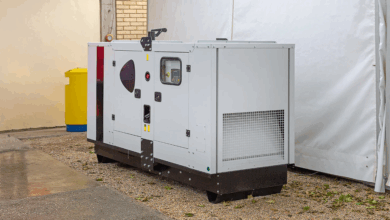
- The Generator Unit: This is the engine (typically running on natural gas or propane) that converts fuel into electricity. It sits outside your home on a concrete pad.
- The Automatic Transfer Switch (ATS): This is the brain of the system. Installed near your main electrical panel, the ATS constantly monitors the utility power. When it detects an outage, it signals the generator to start and automatically disconnects your home from the utility grid before connecting it to the generator’s power. When utility power returns, the ATS switches your home back to the grid and tells the generator to shut down. This automatic function is key to the "whole home" or "standby" generator concept and, crucially, prevents dangerous "backfeeding" of power onto the grid, which can injure utility workers.
- Fuel Source Connection: The generator needs a reliable fuel supply, usually connected to your home’s natural gas line or a dedicated liquid propane (LP) tank.
- Electrical Connections: Wiring runs from the generator to the transfer switch, and from the transfer switch to your main electrical panel.
The Installation Process: Step-by-Step Basics
While the specific details will vary based on your home and the chosen generator, the basic steps involved in a professional whole home generator installation are generally as follows:
Step 1: Assessment and Planning (The Crucial First Step)
This is arguably the most important phase and happens before any physical work begins. A qualified installer will visit your home to:
- Determine Your Power Needs (Load Calculation): They will assess which circuits and appliances you want to power during an outage (e.g., lights, refrigerator, HVAC, well pump, medical equipment). This helps determine the appropriate size (Kilowatt or kW rating) of the generator needed. Oversizing is expensive; undersizing means you won’t power everything you need.
- Evaluate Potential Generator Locations: The installer will look for a suitable spot for the generator unit outside your home. Considerations include:
- Clearance: Generators require specific clearance distances from windows, doors, vents, and combustible materials for safety and code compliance.
- Noise: While modern generators are quieter, placement relative to bedrooms, patios, and neighbors is a factor.
- Proximity: Being reasonably close to the electrical panel and fuel source simplifies installation.
- Accessibility: The site must be accessible for delivery, installation, and future maintenance.
- Local Codes: Setback requirements from property lines.
- Assess Fuel Source Options: They will determine the feasibility and cost of connecting to your existing natural gas line or installing/connecting to a propane tank. The size of the existing gas line or the capacity of the propane tank needs to be sufficient.
- Review Your Electrical Panel: They will inspect your main electrical panel to plan the transfer switch installation and wiring route.
- Identify Code Requirements and Permits: The installer will be aware of local building, electrical, and fuel gas codes and will handle the necessary permit applications. This step cannot be skipped.
Step 2: Obtaining Permits
Based on the assessment, the installer will apply for the required permits from your local municipality. This ensures the installation meets safety standards and is compliant. Work cannot legally begin until permits are approved.
Step 3: Site Preparation
Once permits are in hand, the physical work begins. This involves preparing the chosen location for the generator:
- Grading: Ensuring the ground is level.
- Pouring a Concrete Pad: Generators sit on a stable, level concrete pad to prevent settling and vibration issues. This pad is typically poured specifically for the generator’s dimensions.
Step 4: Placing the Generator Unit
The generator unit is delivered and carefully placed on the prepared concrete pad. These units are heavy and often require specialized equipment to move.
Step 5: Electrical and Fuel Line Installation
This is the most complex part of the installation, involving licensed professionals:
- Electrical Wiring: Conduit is run from the generator unit to the location of the transfer switch, typically near the main electrical panel. Wires are pulled through the conduit to carry power from the generator and control signals (like the start/stop command).
- Transfer Switch Installation: The automatic transfer switch is installed, usually next to or near your existing main electrical panel. This involves intricate wiring to connect your home’s circuits, the utility power, and the generator. This work must be done by a licensed electrician.
- Fuel Line Connection: A licensed plumber or gas fitter connects the generator to your natural gas line or propane tank. This involves running pipe and ensuring safe, leak-free connections.
Step 6: System Testing and Commissioning
Once all connections are made – electrical, fuel, and control wiring – the installer will thoroughly test the entire system:
- Initial Start-up: The generator is started for the first time.
- Transfer Test: The installer simulates a power outage to ensure the transfer switch properly disconnects from the utility, starts the generator, transfers the load to generator power, and then reverses the process when utility power is restored.
- Load Testing: They may test specific circuits to ensure the generator is properly powering the intended appliances.
- Safety Checks: All connections are checked for integrity, and safety features are verified.
Step 7: Final Inspection
A representative from the local permitting office will inspect the installation to ensure it meets all code requirements before signing off on the permit.
Step 8: Homeowner Orientation
Your installer should walk you through the basics of your new generator system, explaining how it works, what the control panel indicators mean, and outlining the recommended maintenance schedule.
Why Professional Installation is Non-Negotiable
While some might consider DIY for certain home projects, whole home generator installation is not one of them. Here’s why professional installation by certified and licensed contractors (electricians and gas fitters) is absolutely essential:
- Safety: You are dealing with high-voltage electricity and potentially flammable fuel sources. Incorrect wiring or fuel line connection is extremely dangerous and can lead to electric shock, fire, or explosion. The transfer switch installation is critical for preventing dangerous backfeed onto the grid.
- Code Compliance: Installation must meet strict national and local electrical, building, and fuel gas codes. Professionals are knowledgeable about these requirements and ensure your system is safe and legal.
- System Sizing & Design: Proper load calculation and system design are crucial for the generator to function correctly and reliably. An undersized system won’t power your needs, while an oversized system is an unnecessary expense.
- Warranty: Most generator manufacturers require professional installation for the warranty to be valid.
- Expertise: Professionals have the specialized tools, knowledge, and experience to handle the complexities of the installation, troubleshoot issues, and ensure the system is properly commissioned for reliable automatic operation.
Potential Challenges and Considerations
- Cost: Whole home generators and their installation are a significant investment. Get detailed quotes covering equipment, labor, permits, and materials.
- Timeline: Installation can take anywhere from one to several days, depending on the complexity of the job and crew availability. Permit approval times also vary.
- Disruption: There will be some disruption during the installation process, particularly during the electrical and fuel line work.
- Maintenance: Generators require regular maintenance (like a car engine) to ensure they are ready to run when needed. This is an ongoing cost and responsibility.
FAQs About Whole Home Generator Installation
- How long does the installation typically take?
Physical installation can take 1 to 3 days, depending on complexity (site prep, distance from fuel/panel). However, the entire process, including assessment, quoting, permitting, and scheduling, can take several weeks or even months, especially during peak seasons. - Can I install the transfer switch myself if I’m handy?
Absolutely not. Installing an automatic transfer switch involves working directly with your home’s main electrical service and the utility connection. This work is highly dangerous and must only be performed by a licensed electrician following strict codes. - What’s the difference between a manual and automatic transfer switch?
A manual transfer switch requires you to go outside, start the generator, and then manually flip a switch to transfer power. An automatic transfer switch detects the outage, starts the generator, and transfers power automatically, without any action needed from you. Whole home generators are typically installed with an automatic transfer switch. - Which fuel source is better, natural gas or propane?
It depends. Natural gas offers an unlimited supply (as long as the grid is up) and is often cheaper per BTU if available. Propane requires a tank that needs refilling but works anywhere, even if the gas grid is affected by a widespread disaster. The best choice depends on availability, cost, generator size, and your needs. - How much does installation cost?
Installation costs vary widely based on generator size, fuel type, site complexity, location, and installer rates. It can range from a few thousand dollars to significantly more. Always get multiple detailed quotes. - Do I need to be home during the installation?
You will need to be home for the initial assessment and potentially at the beginning/end of the installation day, but you typically don’t need to be present every minute, though being accessible for questions is helpful.
Conclusion
Investing in a whole home generator is an investment in peace of mind, comfort, and safety during power outages. While the installation process is multifaceted and requires professional expertise, understanding the basic steps – from the initial assessment and planning to the final testing and inspection – helps you appreciate the scope of the project and prepares you for what to expect.
Choosing a qualified, licensed installer is the single most important decision you will make in this process. They ensure the system is properly sized, safely installed according to all codes, and ready to reliably protect your home when the lights go out. With professional installation, you can rest assured that your generator will be a dependable guardian against the inconvenience and potential hazards of power loss, keeping your household running smoothly no matter the weather or grid conditions.


![How to Bypass CO Sensor on Generator – [4-Step Safety Guide]](https://www.generator411.com/wp-content/uploads/2025/08/co-sensor-on-generator-390x220.png)